CrossLinked Reports
From All n One's bxp software Wixi
Contents
- 1 Overview
- 2 Background
- 3 Worked Example - Setup
- 4 Worked Example - Creating the initial report
- 5 Worked Example - Creating a link to the report
- 6 Worked Example - Customising for the parent of the report
- 7 Worked Example - Customising for the children of the report
- 8 Worked Example - Multiple listings
- 9 Worked Example - Child Rules
- 10 Worked Example - Limiting the report by parameter
- 11 Worked Example - Including eCourse Assets
- 12 Worked Example - Work Flow
1 Overview
bxp software (bxp) has the ability to display a number of reports and representations of data.
One of the more complicated reports that can be built automatically and self generates is a Cross Linked report.
A cross linked report is a report that displays parent and children records in the same report screen.
There are a number of examples of parent child relationships:
- Business - Contacts
- Customer - Support Tickets
- Product - Parts
- House - Tenants
In bxp contacts (CCL records) are children records to a data record (CDA records). I one CDA can have multiple CCL records associated with it. A cross linked report is where two separate forms are linked. The first form contains the parent records and the second form contains the children records.
The linking is done usually by putting a "CrossLink" type field in the second form. i.e. a "Basic - Campaign Listing" type or "Basic - Campaign Search"
2 Background
CrossLinked reports would be considered an advanced setup report due to the complexity of the options available. Cross Linked campaigns allow you to associate children records to parent records. There are many instances where a Parent and Child form are linked. Examples include:
For HR training records
- Parent = Staff Member
- Child = Examination result
For Case management
- Parent = Customer
- Child = Case
For Order management
- Parent = Order
- Child = Order Item
For Billing management
- Parent = Client
- Child = Work Tickets
In each of these scenarios there is a parent form. In the second form a “Cross Campaign” type is added. Setting up linked databases in BE is easy using the “Basic – Campaign Search” and “Basic – Campaign Listing” types when building databases. This question type is linked back to the parent form. Records added to the child form are associated with a parent record.
It becomes important then to be able to look up a parent record and display all the relevant children records.
This report is called a Cross Linked report.
3 Worked Example - Setup
Do demonstrated how a cross linked report works, we build two forms. We make both forms of type Blended for convenience.
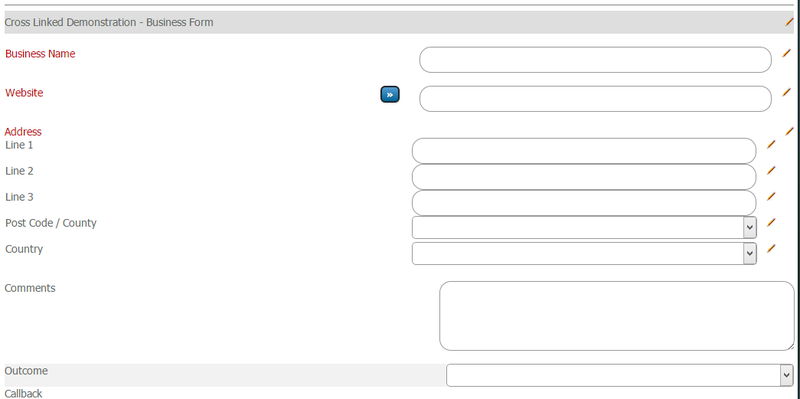
Form one is going to be our "Business" form. Like a sales pipeline, we store numerous business details in the form. So we create the form and add the fields:
- Basic - Text Box : Business Name
- Basic - Website Text Box : Website - Text Box
- Complex - Address Block (1,2,3, Post Code, Country) : Address
It should look like
At this point we also do some tidying up and set the Field Mapping field names and Search fields. For the search fields, we only use the Business Name
We now create a demo record in the form, ACME Incorporated.
Next we need to build a child form and link it to our parent form.
In our demo, the first form, Demo - CrossLinked - Business is form 615. The second form Demo - CrossLinked - Contacts is form 616.
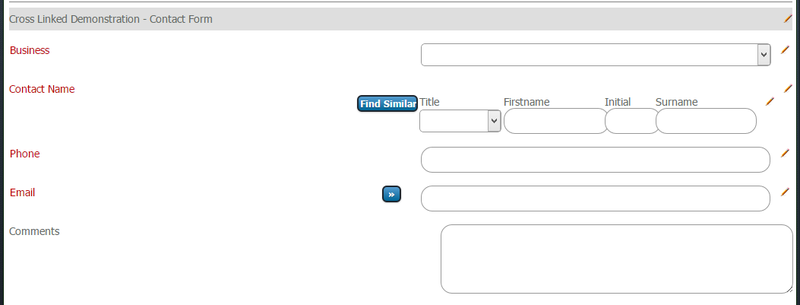
So again we add our fields
- Basic - Campaign Listing : Business
- Complex - Title Block : Contact Name
- Basic - Text Box : Phone
- Basic - Email Text Box : Email
We sort out the field mapping and we set the search display fields to be Firstname, Surname, Phone and Email.
We need to link the Basic - Campaign Listing to the first form. So we use "Answer Values - Modify" and set the field to be intCDA_615_Id
We end up with the following:
We then add a couple of contacts to the second form, to fill out some data.
Record 1 :
- ACME Incorporated
- Mr Joe J Bloggs
- 01 429 4000
- joe.bloggs@acme.com
Record 2 :
- ACME Incorporated
- Ms Jane J Bloggs
- 01 429 4001
- jane.bloggs@acme.com
4 Worked Example - Creating the initial report
A cross linked report is built as part of a customised group report. The cross linked report requires a customised group report to be part of but the settings are completely independent of how the customised group reporting works.
So we create our customised group first.
Main Menu > Data Profiling > Customised - Group Management > Group - Create
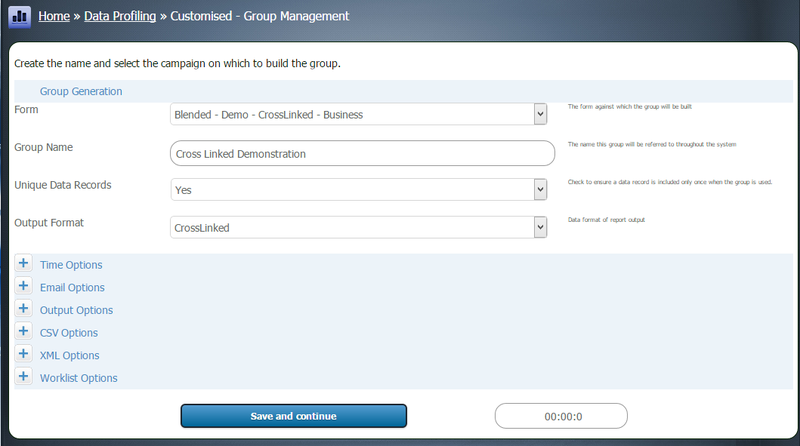
The cross linked report MUST be set up on the parent form. So Form 615 in our example. We only need to fill out the first screen of the Customised Group set up, for the moment.
Form : Blended - Demo - CrossLinked - Business
Group Name : Cross Linked Demonstration
Unique Data Records : Yes
Output Format : Cross Linked
Come back out to the Data Profiling menu, and choose Group - Edit Cross Linked Campaign Engine Settings > Demo - CrossLinked - Business > The form you created and you'll be presented with a screen as follows.
Cross Linked Options
- Layout : Interactive. See CrossLinked_Layouts for the different options available.
- Display Child Data : Yes. This allows you to see data from the child form, i.e. details of the contacts.
- File Output : False. If true all the generated data is sent straight to a file for download. We want it to appear on screen.
- Parameter Replacement Fields : Leave this blank for the moment.
Child Parameters
- Child Campaign : Choose the child form Blended - Demo - CrossLinked - Contacts
- Link Field : This is the Basic - Campaign Listing field. You use field mapping to find this information out. in our example case it is strCDA_616_field_0_1
- Child Campaign fields : Leave this blank for the moment.
- Child Calculation fields : Leave this blank for the moment. For more info on this field CrossLinked_Calculation_Fields
Interaction Options
- Flow Control : SameWindow
- eCourse Asset Ids : Allows eCourse assets to be drawn into the report. Leave blank.
- Show Parent Headers : False
- Parent Buttons : No
- AED Buttons - Parent : False
- Show Child Headers : False
- Child Buttons : No
- AED Buttons - Child : False
5 Worked Example - Creating a link to the report
Now getting into the report is the next step, so that you can see what you've set up so far before we begin tweaking.
We can use the Control Bar module to speed things up here and store our link for us.
Main Menu > Data Profiling > Instant - Dashboards > Control Bar Button - Cross Linked > Demo - CrossLinked - Business > Choose a Personal link > Click create the link
From here on your Main Menu there should be a new button in your private links called "CrossLinked - Cross Linked Demonstration"
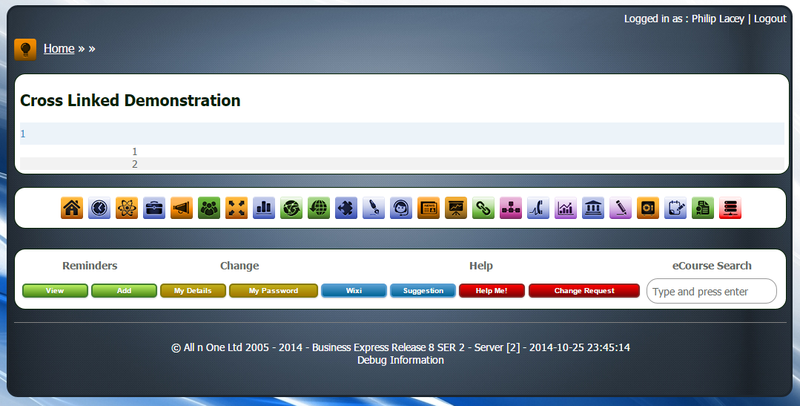
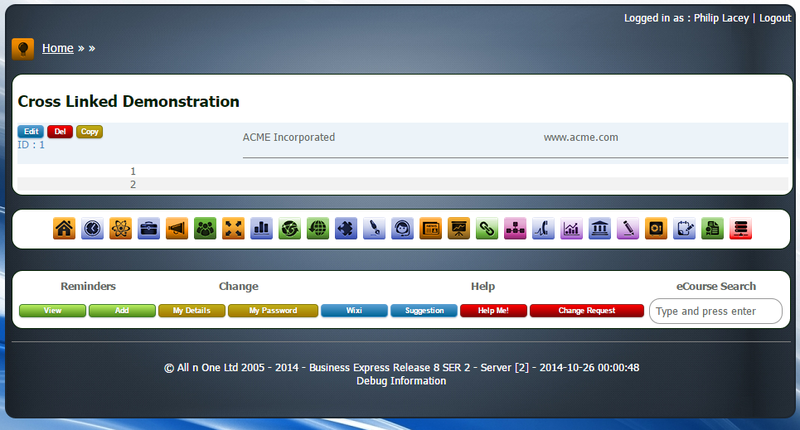
When you click it, you won't get that much of an interesting report to look at. You will however note that the parent is displayed as 1 and indented below it are the two children contacts with ids 1 and 2.
6 Worked Example - Customising for the parent of the report
The first challenge we have is that we need to let the report know what parent fields to display.
This is done through the "Fields and Grouping" part of the customised report
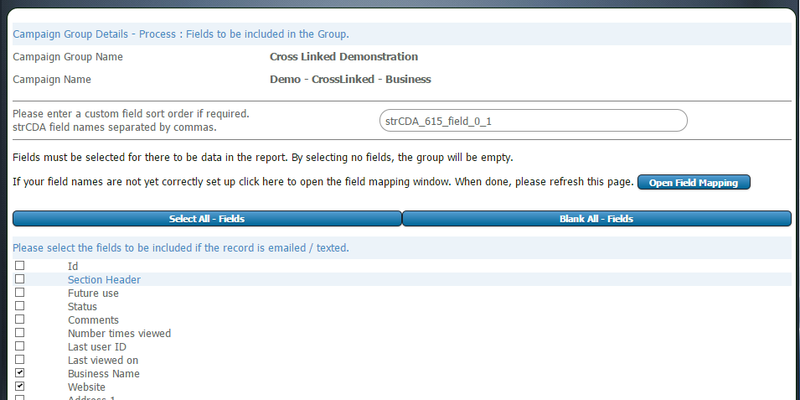
Main Menu > Data Profiling > Customised - Group Management > Group - Edit Fields and Sequence > Demo - CrossLinked - Business > Choose your Customised Group > Tick "Business Name" and "Website" then Save and continue > On the next screen "Save and Continue" again.
Now we use our private link to review our report. You can now see the parent row has the fields displayed.
We now go back in to modify the settings of the CrossLinked report
Main Menu > Data Profiling > Customised - Group Management > Group - Edit Cross Linked Campaign Engine Settings > Demo - CrossLinked - Business > Choose your Customised Group > Interaction Options >
- Parent Buttons : Yes
- AED Buttons Parent : False
We see now that we have in the report and easy button to go straight to that record.
Tweaking again we add in the AED buttons. Main Menu > Data Profiling > Customised - Group Management > Group - Edit Cross Linked Campaign Engine Settings > Demo - CrossLinked - Business > Choose your Customised Group > Interaction Options >
- Parent Buttons : Yes
- AED Buttons Parent : True
Retrying our report we now see:
- AED Buttons are the new Edit Delete and Copy buttons to the left of the parent record
7 Worked Example - Customising for the children of the report
Now we want to customise the children fields. First thing we need to do is to pick up the fields we want to display for the children. We get this from the field mapping of the child form:
- Contact Name - Firstname: strCDA_616_field_1_2
- Contact Name - Surname: strCDA_616_field_3_2
- Phone: strCDA_616_field_0_6
- Email: strCDA_616_field_0_7
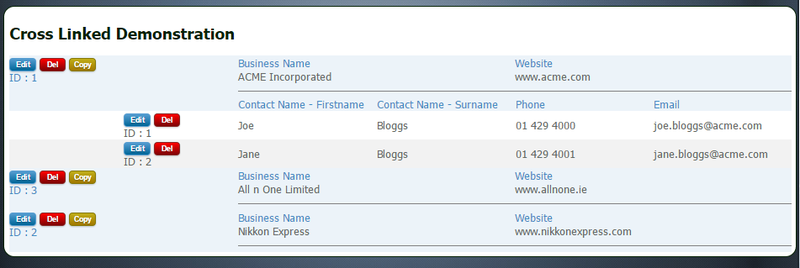
We add these into the report settings, separated by commas. We also turn on "Child Buttons = Yes" in the Interaction Options and we get:
For completeness we turn on the AED buttons for the Children.
In the Interaction Options we can also enable the "Show Child Headers" which adds the column headings for the children.
8 Worked Example - Multiple listings
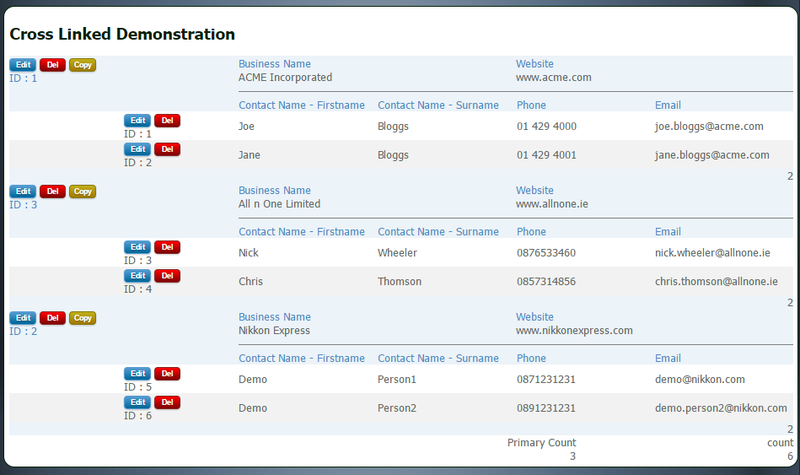
Cross Linked reports easily handle multiple companies on the same report. For this example we add two more companies. Nikkon Express and All n One Limited.
They're not alphabetically sorted, they're sorted by ID. So we tweak the listing by modifying the fields and sequence of the report to order by Business Name.
No we go in and add two different contacts each.
9 Worked Example - Child Rules
It is possible to apply rules to the children records to perform mathematical calculations within the report. The following example adds a rule to count the number of contacts each parent has.
CrossLinked_Calculation_Fields gives examples of how this field is used.
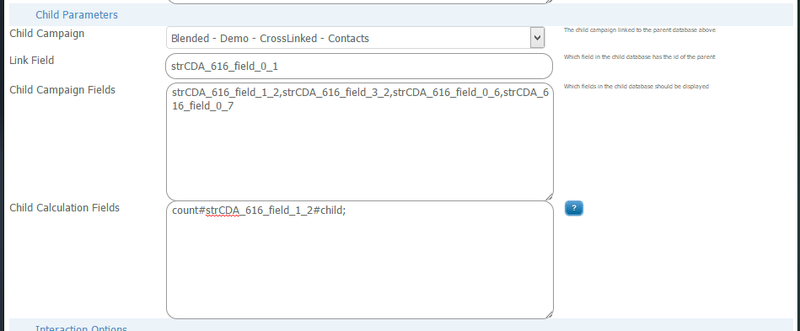
In our example we add "count#strCDA_616_field_1_2#child;" to the "Child Calculation Fields". You can see in the output report to the right, the count, with the summation total of 6 at the bottom.
10 Worked Example - Limiting the report by parameter
To allow these reports to be very selective and only show one parent record at a time, it is possible to pass via QueryString parameter the Id or other limiting factor into the grouping. Lets say for example we wanted the report to only show the All n One company example... i.e. Parent ID = 3
Firstly we modify the Customised Group parameters to look for an Id. "Campaign Group - Grouping Parameters" modify this to look for the static Id of 3
Then we modify the parameters to let it know to go looking for a changing value
If we pull the report we don't get an answer we want
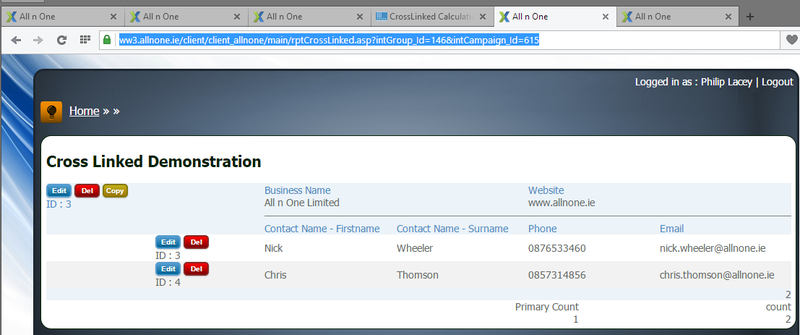
We need to modify the URL of the query slightly. we change it from "rptCrossLinked.asp?ID=146" to "rptCrossLinked.asp?intGroup_Id=146&intCampaign_Id=615" through the Control Bar module. After modifying the query, we get:
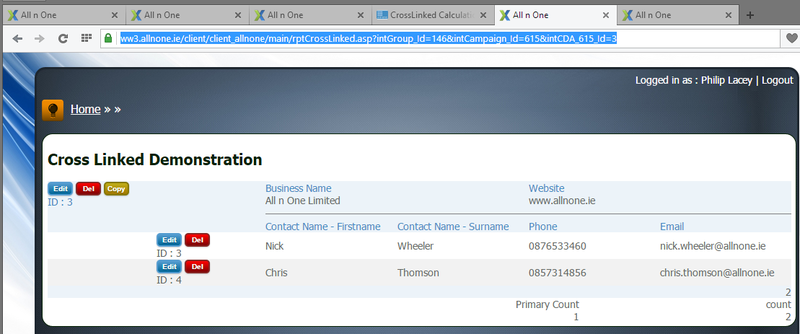
We then want to extend the query even further by making the Id to display dynamic. We change the URL to "rptCrossLinked.asp?intGroup_Id=146&intCampaign_Id=615&intCDA_615_Id=3"
We change the "Campaign Group - Grouping Parameters" to look for --intCDA_615_Id--
Now pulling the report we get:
Using this final parameter we can change the ID to anything. This then opens up the possibility of using this report from anywhere just by passing in the Id of the record to display. The primary areas to use this from are:
- Worklists: redirection to an alternate URL and append in the ID of the record clicked
- Outcomes: redirection to an alternate URL and append in the ID of the parent, or parent of the child record.
11 Worked Example - Including eCourse Assets
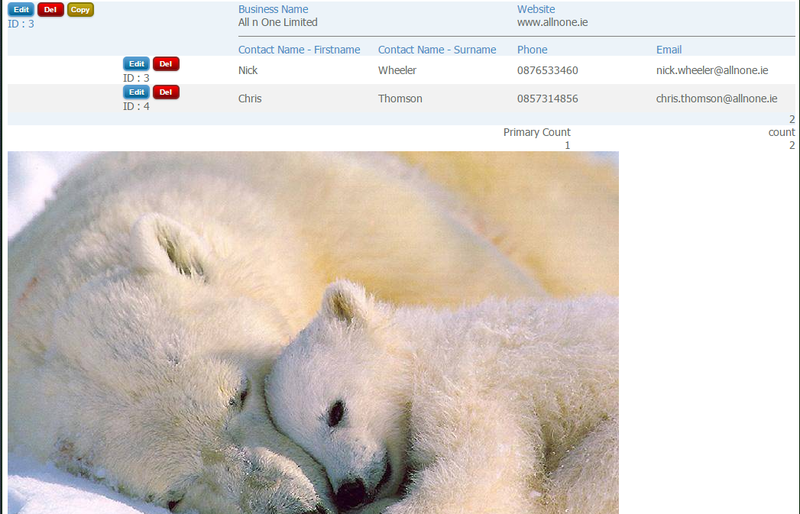
The final customisation of the report enables your own custom HTML to be included on the page as well to add an infinite amount of flexibility to the report. By specifying the Asset Id of the item you wish to display in the report, it will be rendered below the report.
If you put HTML including JavaScript, you can use the items above to perform extensive customisations.
Main Menu > Data Profiling > Customised - Group Management > Group - Edit Cross Linked Campaign Engine Settings > Demo - CrossLinked - Business > Choose your Customised Group > Interaction Options > eCourse Asset Ids.
You can add multiple assets separated by commas. In this example the asset draws the photo of Polar Bear and cub.
12 Worked Example - Work Flow
If as mentioned above in "Limiting the report by parameter", you wish to use the report to drive activity, the buttons on page can be change to "open in a new window" or to "continue processing in the current window"
Main Menu > Data Profiling > Customised - Group Management > Group - Edit Cross Linked Campaign Engine Settings > Demo - CrossLinked - Business > Choose your Customised Group > Interaction Options > Flow Control
- SameWindow : Means that the new processing will occur in the current tab in focus
- NewWindow : Means the new processing will open in a new tab
If the report is used as part of an enhanced process flow then SameWindow is the best choice. If however you're using the CrossLinked report for data cleaning or as a research tool, then NewWindow keeps the parent record open for easier management.


