Generating a New Cetificate Signing Request (CSR)
From All n One's bxp software Wixi
1 Important Notes Before Starting
When requesting your SSL certificate there are a few things that you need to be aware of before even attempting to add it to WordPress.
- The domain needs to be correctly added for the website i.e. bxpsoftware.com is not the same as www.bxpsoftware.com
- When filling out the SSL details use the www. version as this will cover bxpsoftware.com and www.bxpsoftware.com
- A technical contact email is required, only certain email boxes are allowed so you may need to create a new one.
- Your SSL provider will tell you which email addresses are allowed.
2 How to Create a CSR in WordPress
You will need access to the back end of your website. If you do not have this then please contact your website administrator.
Step 1 Login to cPanel on your website. On most websites it can be reached by using your domain home address followed by a colon and a port number. Examples of this: http://www.mydomain.com:2082 or http://www.mydomain.com:2083 were my domain is name of your web domain name i.e. http://www.google.ie:2082.
Step 2 Once you are logged in scroll down to the security section. Select SSL/TLS Manager.
File:cPanel Security Panel.png
From here you will be given three options. Select Certificates (CRT) - Generate, view, upload, or delete SSL certificates.
Step 3
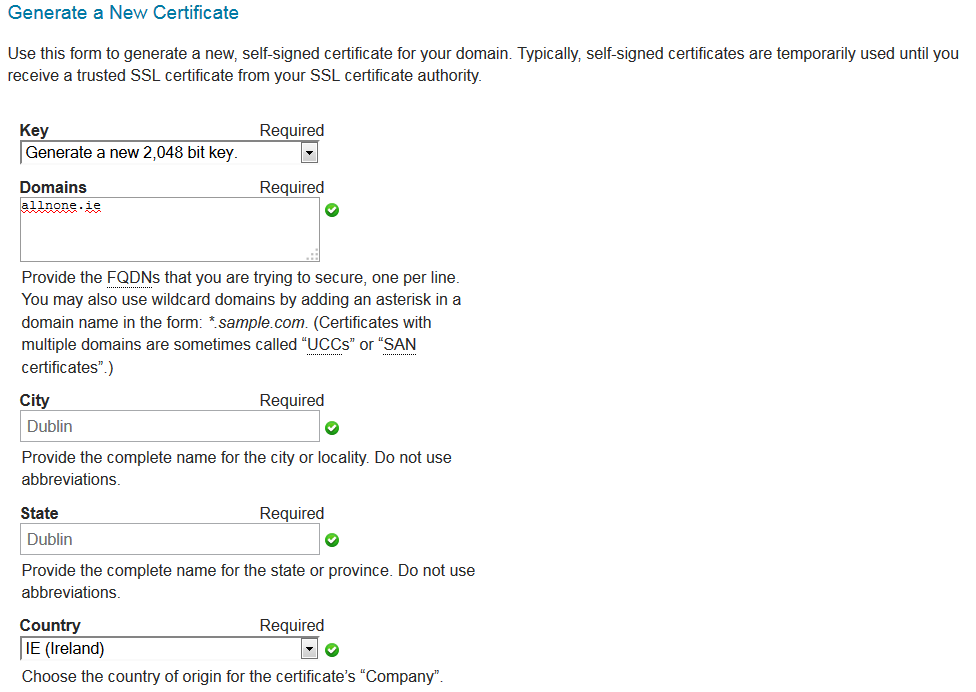
The next step is to create the CSR.
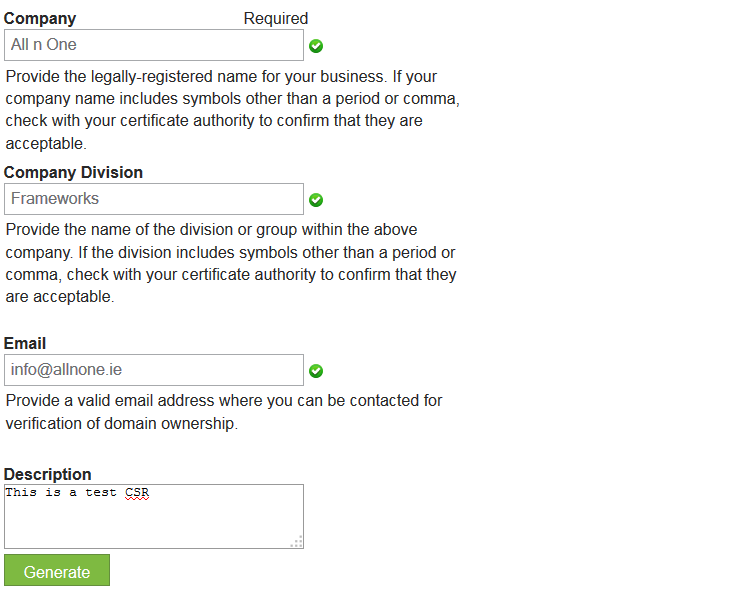
Scroll down to Generate a New Certificate and fill in the domain all the other details.


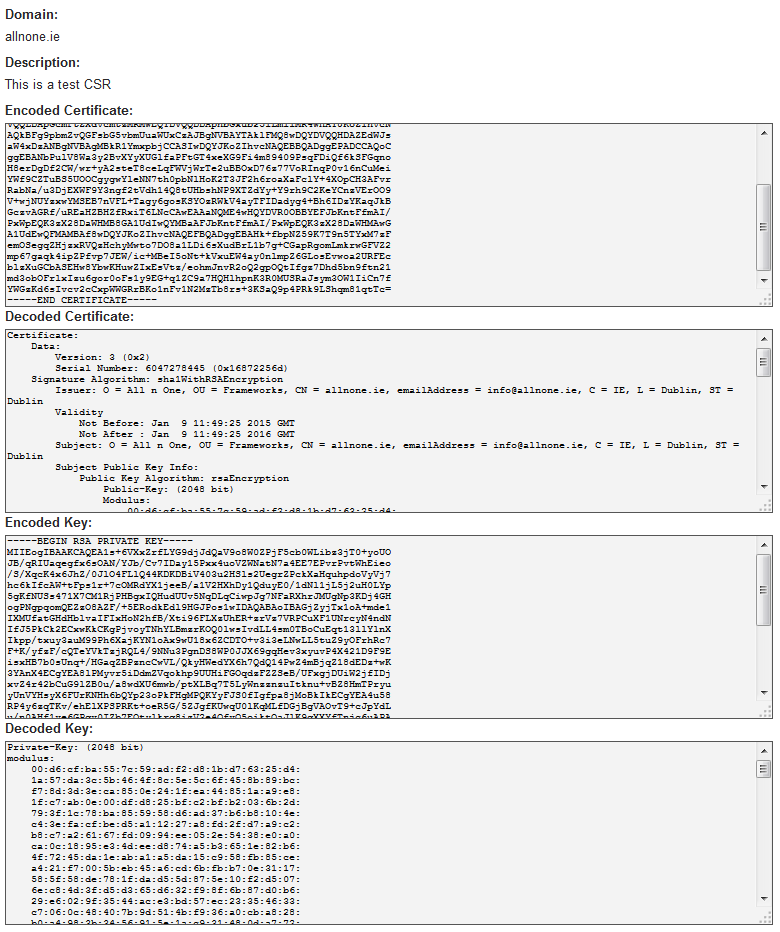
Then click generate to create the certificate. It will look something like the below. You will need this information to create an SSL.


