Control Bar Big Buttons
From All n One's bxp software Wixi
Contents
1 Introduction
When you log into a system it can often be useful to optimise your experience by putting links to the most common tools you would use.
For a number of years, the All n One team have been developing a My Big Buttons solutions for Main Menus and will continue to do so.
In order to facilitate clients being able to create usable similar replicas, we have implemented the Big Button engine.
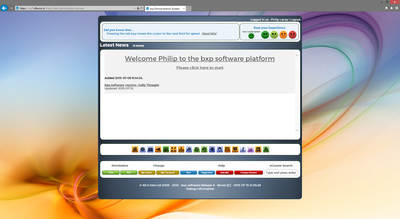
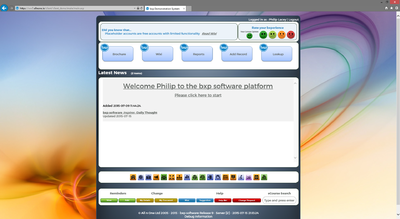
2 Example Main Menu
| Before | After |
|---|---|

|

|
3 Building a Button
All of the building and managing is done in the Control Bar module. ![]()
Main Menu > Control Bar > Personal Links > My Big Buttons >
To make a button:
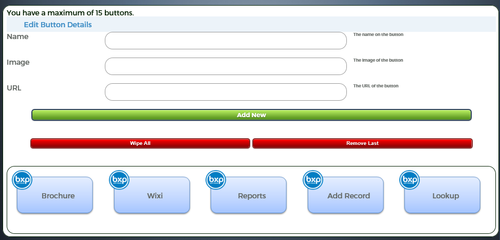
- Name: Type the name of your button. This is the button label. You're limited to 9 characters as this ensures all your text fits on the button.
- Image: Allows you to specify a custom image. Alternately you can use a pre-designed button. Just type in a numeric code, e.g. 11 and the system will translate the image.
- URL: The URL the page will go to when you click the button.
Try a simple example for yourself
- Name: Google
- Image: 11
- URL: http://www.google.ie
Click the "Add New" button. The box below will update and show you a sample of your Big Button bar.
Click one of the buttons below to edit it. Just remember to click "Edit Values" to save your changes.
You have a maximum of 15 buttons in total. The system will sensibly swap buttons around between 4 per row and 5 per row automatically to use the most space possible.
N.B. If the bars are not appearing on the Main Menu, check the important note below.
4 Moving buttons
If you want you can edit any button at any time. In Main Menu > Control Bar > Personal Links > My Big Buttons > click the button you want to change and all the details will appear in the fields above. Update the details as needed and click "Edit Button". This will change the button without any need to "Add" or "Delete" buttons.
Please note that the code for the images below will be translated into the full address of the image. e.g. 31 becomes 
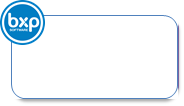
5 Sample button outlines
6 For System Administrators
If you look at the source of the Big Buttons editing page and find "strButtons" you will see the string that is used to create the buttons.
- [ [ #SEP# ] ] separates the values
- [ [ #BUTTON# ] ] separates the buttons
You can mass apply a set of buttons to a group of users using
Main Menu > System Access Management > System Management > Group User - Modify Details > Search for the Users >
From the top "Please select a value type to update" choose "Big Buttons"
In the text box "Please paste in the Big Button string to be used." paste in the strButtons string you captured above. In this way you can mass set peoples buttons for them.
N.B. This will overwrite any buttons they've created for themselves.
7 Important note for those with custom configs
The Big Buttons bar is an interface bar. Interface_Bars Specifically it is bar 38.
IF you have a custom setup for your main menu,
- set on your account Main Menu > Bottom of the Screen > My Details > Interface Options > Main Menu
- set on your system Main Menu > System Access Management > System Management > System Settings > User Interface > Main Menu
then you will need to add bar 38 to the list. e.g. if your config is 22,25,2,17,37,4,18,13,19,5 add bar 38 just before the 4 to make 22,25,2,17,37,38,4,18,13,19,5
8 Copying Big Buttons To Another User Account
Big buttons can be copied from one account to another.
This will override any big buttons the user currently has and will replace them with the big that the user being copied has.
Main Menu >> Control Bar >> Security Management >> Copy a users Big Buttons
Simply select the user to copy in the first box and the user to copy the buttons to in the second box.
Click Copy Big Buttons and the buttons will be copied to the user.
9 Your Own Buttons
If you would prefer to have your own customised buttons, then no problem at all.
The template file from which the backgrounds were made is available from File:Big Buttons Template v1-1.pptx
The images 180px wide by 100 px tall. You upload your background button into your custom folder.
Take note of the full URL of the file you uploaded.
Go into your button and paste in the URL into the "Image" line
Hey presto, you're using your own customised buttons.
10 Note about opening
To facilitate a big button opening in the same tab rather than opening in a new window simply put an ! character at the start of the URL before the http / https.
The ! will be stripped and the system will redirect the button to open in the same window.


